Do you know how to connect Bluetooth to Cricut Explore Air 2? If not, chillax! In this blog, I have got your back with quick stepwise instructions. I can’t forget the days when I used to work as a professional expert for Cricut. Many Cricut users went through many issues that hindered them from connecting their Cricut Explore Air 2 or any other model to their devices. Whether it is a mobile phone or computer, various users have different problems.
It was daunting in the beginning, but I eventually got used to it. Similarly, you can master the Cricut connection and set it up easily. Let’s delve into the blog and start following the steps one by one.
How to Connect Bluetooth to Cricut Explore Air 2 on Windows?
Connecting Cricut Explore Air 2 to your Windows computer is fun. All you need to do is place your machine on a flat surface. Ensure the distance between the PC and Cricut is not more than 10-15 feet. Once it is done, you can start following the steps below:
- Initially, turn on your Cricut machine and the Windows computer.
- On your computer, head to the Start menu (Windows icon) and click on Settings.
- After that, you have to select the Devices option.
- Now, you need to confirm if your Bluetooth is ON, then click on the Add Bluetooth or other device.
- Afterward, choose the Bluetooth option.
- Then, wait for a while for your computer to locate your Cricut model.
- As it occurs in your available list, you need to choose the model and move ahead.
- Finally, you have completed the pairing.
How to Connect Bluetooth to Cricut Explore Air 2 on Mac?
Now, if you want to connect your Cricut to your Mac, you need to make sure your minimum distance is 10 to 15 feet between your Cricut and your computer. Once done, follow the steps described below correctly:
- You will need to check if your Mac is turned on or off.
- Once you have turned it on, you will need to place the Mac and machine within 10 to 15 feet.
- Now, you will need to proceed to the Apple menu.
- You also have to select the System Preferences option.
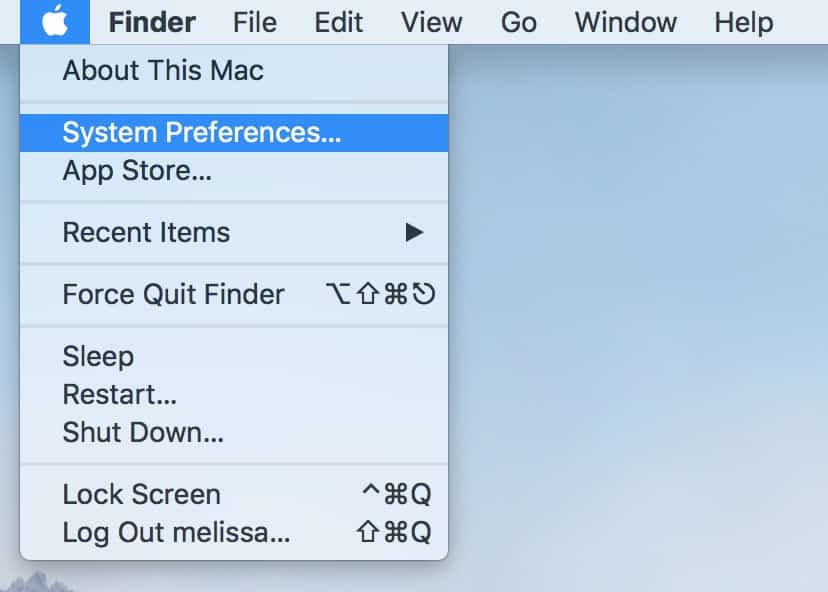
- Here, you should look into the Bluetooth choice on your Mac computer.
- Afterward, you will need to click on Bluetooth.
- Next, you will choose your Cricut model from the available list.
- Lastly, you finally connect to your Mac computer when the pair is complete.
How to Connect Bluetooth to Cricut Explore Air 2 on iOS?
Even if you are using your Cricut via a mobile device, you will need to maintain a distance between your phone and the Cricut cutting machine. Now, you will have to follow the steps given below if you want to connect your Cricut and set it up further. Let’s get started:
- Navigate to your iOS device and move to the Settings app.
- Then, you should open up the settings on your iOS phone.
- After that, you have to look for the Bluetooth option.
- Once you have the Bluetooth option, enable Bluetooth by just clicking on the toggle button.

- And then, you need to wait for some time.
- See whether your device detects any Cricut devices in nearby available ranges.
- After some time, you should see the machine on your iPhone/iPad.
- Now, simply click on the device that arises on the phone and move to pair it.
- Moreover, you will need to click on the Pair button.
- Next, you have finally connected your Cricut to your iOS devices.
- You can now easily move further and setup your Cricut machine without any hassle.
How to Connect Bluetooth to Cricut Explore Air 2 on Android?
Now, let’s see how to connect the Cricut Explore Air 2 cutting machine to Bluetooth on an Android device. Then, follow the steps that I have given below:
- When you need to go to your Android phone,
- Then, you have to go to your Settings.
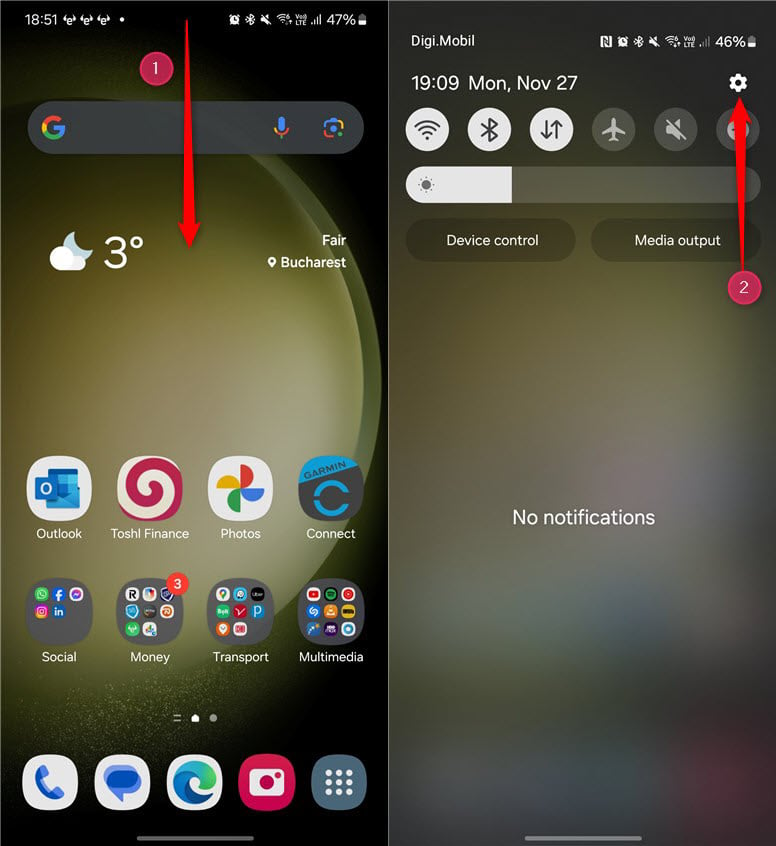
- Once you are on your phone settings, head to the Bluetooth option.
- In the following step, select the Bluetooth option.

- After that, you need to hold on for a while.
- Now, you should visit until your device detects your nearest Cricut machine.
- Once the machine is visible, hit on it to pair your machine.
- Finally, you have understood how to connect your Cricut Explore Air 2 to your computer.
FAQs
Question 1: Do I need to connect Cricut to computer?
Answer: Yes, it is essential to connect your Cricut to your computer if you want to run the Cricut Design Space software. The software is used to create, edit, and modify the designs, and then it can be sent to your Cricut. However, sending it to your Cricut is only possible when you have connected your cricut to your computer via Bluetooth or USB cable.
Question 2: Why won’t my Cricut connect to my Computer?
Answer: If your Cricut is not connecting to your computer, then you should try the following points:
- Check the power: You need to ensure your Cricut is turned on and within 10 to 15 feet of your computer.
- Check Bluetooth: Now, you have to check whether you have turned on Bluetooth properly. If not, you should connect it properly and then try again.
- Check software: You must check your Cricut’s firmware and software update. You can restart or reinstall the Cricut Design Space to fix the issues.
Question 3: Can I connect Cricut to a USB cable?
Answer: Yes, you can connect except for Cricut Joy. USB connection is easier than connecting to Bluetooth. A USB cable can provide a more reliable connection than your Bluetooth connection. Besides, connecting through USB is a faster method, as you will only need to plug in the cable, and you are done. After that, you can easily setup your machine.

Leave a comment